
If you already have local access to your data, feel free to upload it to Dashbot to get started!
Beyond generating API keys and connecting to your application, Dashbot can ingest CSV, TSV and JSON files via our data upload function. This features enables you to get up and running in the Dashbot platform quickly if you already have access to your data.
Required fields and syntax in your file
For Dashbot to properly receive and process your file, there are 4 required fields and the proper syntax necessary in order for us to successfully upload your data. The four required fields are "Text", "Timestamp", "Incoming" and "User ID".
Below is table with more information and syntax on the 4 required fields:
| Parameter | Description | Type |
|---|---|---|
| text | Required Text of the conversation | String |
| userId | Required This is a unique identifier for all participants in the conversation (e.g. user and agent) | String |
| timestamp | Required The server timestamp must be sent in UNIX time (epoch time). You can use a website like https://www.unixtimestamp.com/ to convert your timestamp | Number |
| incoming | Required This is a binary field indicating whether a message in incoming (i.e. from a user) or outgoing (i.e. from an agent or bot). The values must be true or false and is case sensitive | String |
| intent | Required for bot integrations This is the intent (incoming or outgoing) that was triggered for each message in the conversation | String |
You can of course have additional metadata for us to process as extra fields in your file, but the above are the minimum required fields we need for a successful upload!
Example Templates
Now that we understand the minimum requirements of fields and syntax needed for a successful upload, below are an example each of a CSV file and a JSON file with the proper formatting and required fields for your reference.
Example CSV File
For an example of what the proper format of a CSV file for upload should look like, click here!
Example JSON File
For an example of what the proper format of a JSON file for upload should look like, take a look at the example format below:
{
  "text":"hey",
  "userId":"7675836189527716",
  "incoming":true,
  "dashbot_timestamp":1703240310000,
  "intent": {
    "name":"HELLO",
    "confidence":0.9634560130000001
  },
  "rawEventLogTypeId":1,
  "type":null,
  "extraInfo": {
    "eventName":null
  },
  "platformJson": {
    "firstMessage":true,
    "incoming":true,
    "gender":"female",
    "customerTier":"silver",
    "customerStatus":"new",
    "locale":"en-CA"
  },
  "sessionId":"1434868331"
}
{
    "text":"Hi! How can I help you?",
    "userId":"7675836189527716",
    "incoming":false,
    "dashbot_timestamp":1703240315000,
    "intent":   {
        "name":"HELLO_RESPONSE"
    },
    "rawEventLogTypeId":1,
    "type":null,
    "extraInfo":    {
        "eventName":null
    },
    "platformJson": {
        "firstMessage":false,
        "incoming":false,
        "gender":"female",
        "customerTier":"silver",
        "customerStatus":"new",
        "locale":"en-CA"
    },
    "sessionId":"1434868331"
}
{
    "text":"I want to know where to track my deliveries",
    "userId":"7675836189527716",
    "incoming":true,
    "dashbot_timestamp":1703240320000,
    "intent":   {
        "name":"TRACK_ORDER",
        "confidence":0.948014021
    },
    "rawEventLogTypeId":1,
    "type":null,
    "extraInfo":    {
        "eventName":null
    },
    "platformJson": {
        "firstMessage":false,
        "incoming":true,
        "gender":"female",
        "customerTier":"silver",
        "customerStatus":"new",
        "locale":"en-CA"
    },
    "sessionId":"1434868331"
}
{
    "text":"DM34137KMX",
    "userId":"1165873486259425",
    "incoming":true,
    "dashbot_timestamp":1703278090000,
    "intent":   {
        "name":"ORDER_NUMBER",
        "confidence":0.999861845
    },
    "rawEventLogTypeId":1,
    "type":null,
    "extraInfo":    {
        "eventName":null
    },
    "platformJson": {
        "firstMessage":false,
        "incoming":true,
        "gender":"female",
        "customerTier":"bronze",
        "customerStatus":"new",
        "locale":"en-CA"
    },
    "sessionId":"9950934871"
}
{
    "text":"Sorry, I can't find any existing order matching that number.",
    "userId":"1165873486259425",
    "incoming":false,
    "dashbot_timestamp":1703278095000,
    "intent":   {
        "name":"ORDER_NOT_FOUND"
    },
    "rawEventLogTypeId":1,
    "type":null,
    "extraInfo":    {
        "eventName":null
    },
    "platformJson": {
        "firstMessage":false,
        "incoming":false,
        "gender":"female",
        "customerTier":"bronze",
        "customerStatus":"new",
        "locale":"en-CA"
    },
    "sessionId":"9950934871"
}
{
    "text":"Operator",
    "userId":"1165873486259425",
    "incoming":true,
    "dashbot_timestamp":1703278100000,
    "intent":   {
        "name":"REQUEST_HUMAN",
        "confidence":0.922092107
    },
    "rawEventLogTypeId":1,
    "type":null,
    "extraInfo":    {
        "eventName":null
    },
    "platformJson": {
        "firstMessage":false,
        "incoming":true,
        "gender":"female",
        "customerTier":"bronze",
        "customerStatus":"new",
        "locale":"en-CA"
    },
    "sessionId":"9950934871"
}
{
    "text":"Okay, I'm getting someone from my team to help you.",
    "userId":"1165873486259425",
    "incoming":false,
    "dashbot_timestamp":1703278105000,
    "intent":   {
        "name":"REQUEST_HUMAN_RESPONSE"
    },
    "rawEventLogTypeId":1,
    "type":null,
    "extraInfo":    {
        "eventName":null
    },
    "platformJson": {
        "firstMessage":false,
        "incoming":false,
        "gender":"female",
        "customerTier":"bronze",
        "customerStatus":"new",
        "locale":"en-CA"
    },
    "sessionId":"9950934871"
}
Instructions on how to upload your file to Dashbot
Now that we have our file ready with the proper fields and syntax needed, let's walk through the simple process of how to upload your file to Dashbot:
- To get started head to Dashbot & log in.

-
Click on the "Upload File" button and then select the file you are interested in uploading.
-
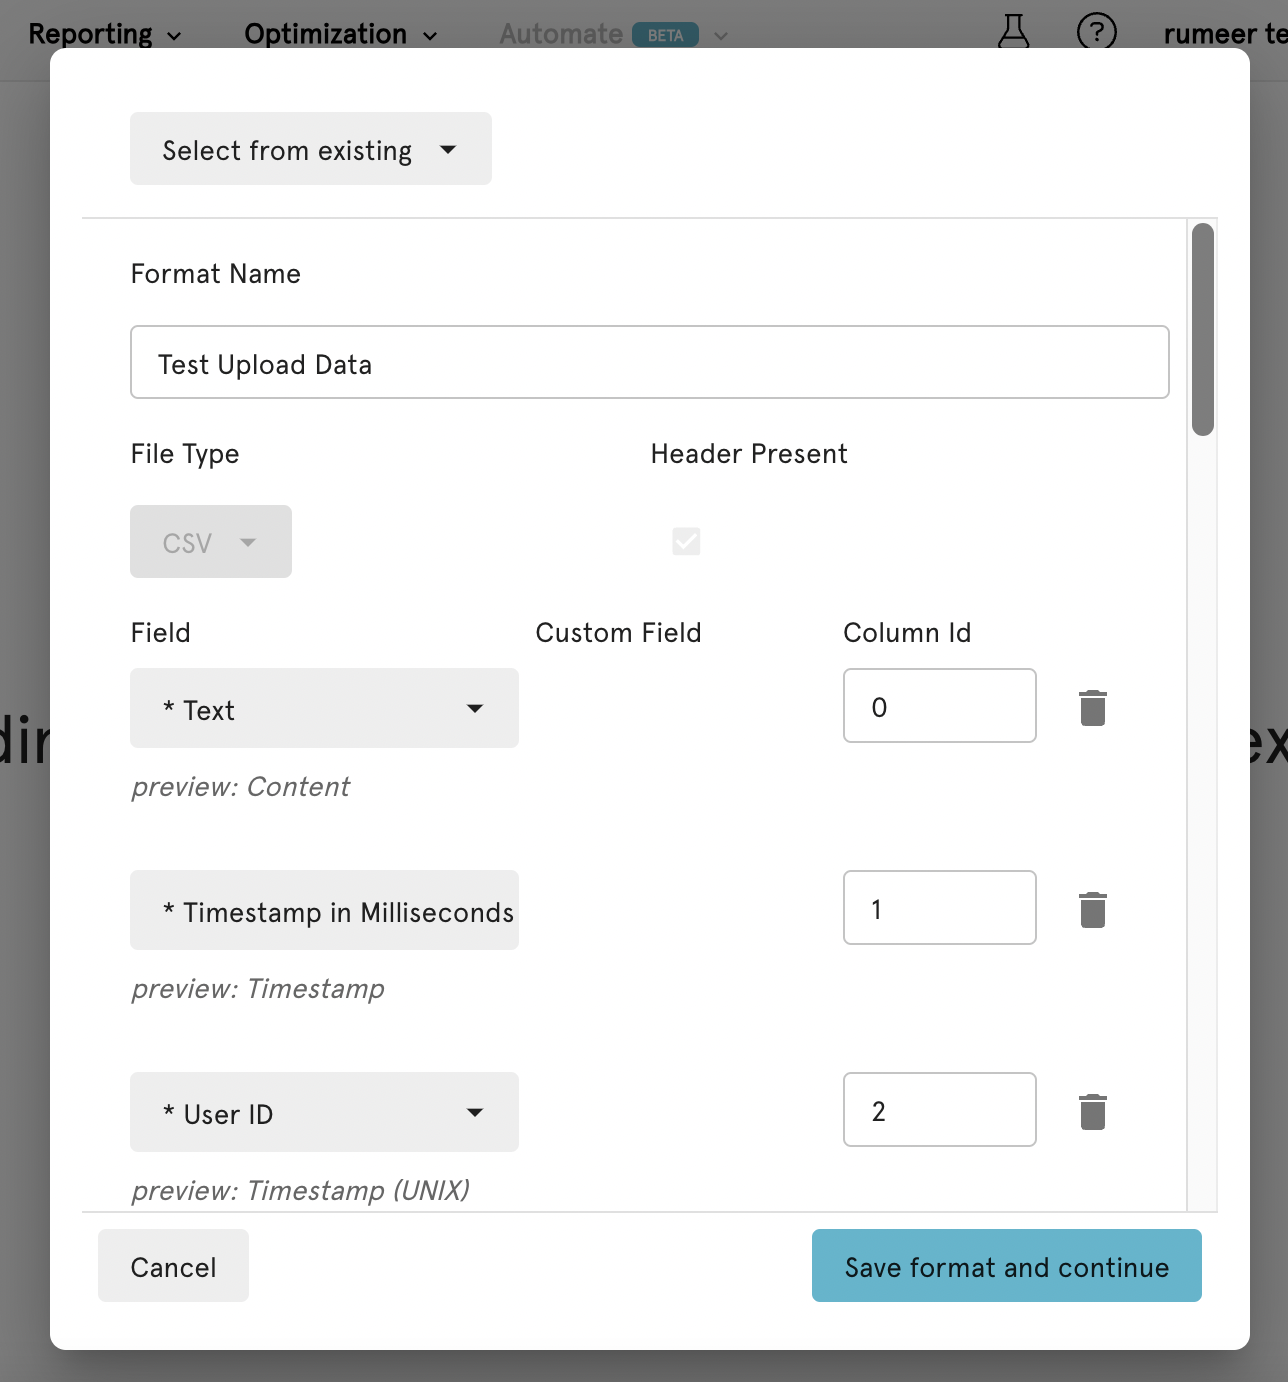
Dashbot will interpret the file and prompt you to map the 4 required fields to certain columns in your file. Again, the 4 required fields are "Text", "Timestamp", "Incoming" and "User ID". Once you have mapped the 4 required fields you can click on "Save the Format and Continue."
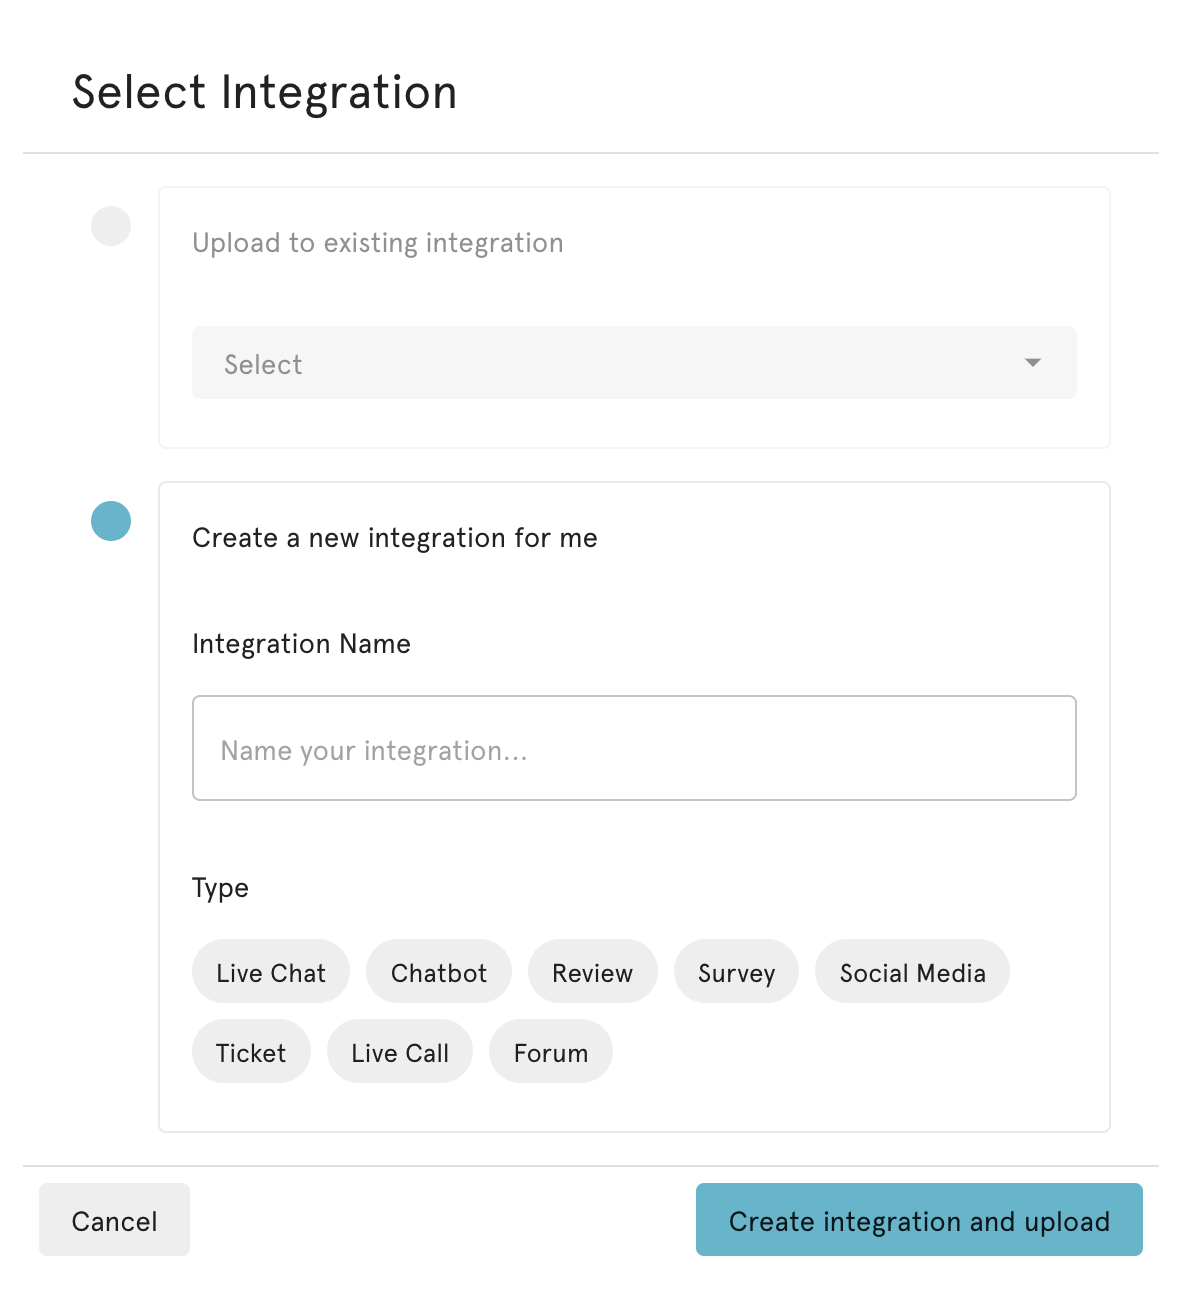
- After you save and continue, you must assign and name your integration. Click "Create integration and upload."
Congrats! You've now uploaded your file to Dashbot! You should now see a status symbol on your file upload, and once the status shows as "Success" you can check the platform to see your data loaded.